Showing posts with label gifts. Show all posts

Wednesday, June 29, 2011

Birthday Bucket

My son will be turning 2 next week (WHAAA?!?!?!?  When did that happen?). I've been busy, busy trying to get everything ready for the big day (I'll post pics of the party here so you can see what all that I've done!), which is one of the reasons I've been MIA here lately.

One thing that we do to get ready for the celebration is to bring out the birthday bucket. 


I purchase seven small, inexpensive gifts, wrap them and put them into the birthday bucket. Starting one week before his birthday, he gets to choose one gift from the bucket to open. He gets to open one gift per day leading up to this birthday, thus creating a little birthday countdown.

Last year I just purchased a bucket from the Dollar Tree and called it a day. This year I decided to jazz it up a bit. I downloaded the balloon banner from the Silhouette store and used Brady Bunch Remastered font to create my design. I cut it out on white vinyl and applied it to my bucket. 


A couple of curly ribbons and big polka-dot bows later, I've got this:


Pretty darlin' if I do say so myself!

Thursday, March 10, 2011

St. Patrick's Day Gift Idea

This morning my MOMS group had it's monthly Brunch Bunch get together.  I decided that I wanted to make a little something, something for the other mommies.  I played on the word "pattie" and took some inspiration from it is what it is (check out Beth's blog if you haven't already!) and created these cute little goodie bags:


I used my Silhouette to cut out the green scalloped circle and white Happy St. Patties circle, but you can easily do the same with punches.  The bags are pretzel rod bags that I got at Michaels (75 bags for around $2 - even less if you use your 40% off coupon!) and the mint patties I found at Walmart ($2.50 for a bag).  I used Pharmacy font (one of my favs) that I download for free from dafont.com and the shamrock was downloaded from the Silhouette store (there is a font on dafont.com that you can download that has a four leaf clover: wmshapes1 is the name of the font and the w is the four leaf clover).

I thought they were pretty clever and cute and the other moms seemed to really like them!!

Join  us Saturdays at tatertotsandjello.com for the weekend wrap 
 up           party!


Sunday, February 13, 2011

I Think You're a Hoot! - Owl Oreo Valentines

Somewhere (and for the life of me I cannot remember where so I apologize in advance to whomever I got this idea from!) I saw how to make adorable owls using Oreo cookies.  This gave me an idea for a Valentine for my son to give to his cousins.


I started with Oreos (or in my case faux Oreos!) for the body of the owl. I then melted white candy melts in the micorwave and filled a baggie with the melted candy and snipped off a tiny bit of the corner of the bag so I could pipe on the whites of the eyes.  Then I added yellow & red food coloring to the remaining white to create the orange for the beak and feet.  Finally I used mini chocolate chips to finish the eyes.  And what do you know, the cutest owls I've ever seen!


I put them in snack bags and stapled the bag topper that I created to the top as the finishing touch!  I just love them and I hope my neice and nephew do too! 

10 things I love about you......

While lounging in the sun on vacation, I was flipping through the pages of the February Martha Stewart Living magazine when I stumbled on this idea for a Valentine for my hubby. I tried to find the card on her website to link to here, but wasn't successful......it is in the magazine if you want to pick it up to see her version!


The magazine showed red envelopes with white notecards, but I had white envelopes with red cardstock so I just went with what I had on hand!  I used my Silhouette to create 10 note cards with a scalloped edge and tiny heart cutouts.  On each card I wrote one thing that I loved about my husband (you can always make me laugh, you always wash the dishes, etc...).  They can be sweet, silly or anything you like.  For five of the cards, I included gift certificates/cards that corresponded to the message on the card. 


Mine were as follows:
  1. You can always make me laugh:  Gift card to the movies to be used to see a funny film together
  2. You can always make my heart melt:  Gift card to Dairy Queen (ice cream melts!!)
  3. You always tell me I look beautiful, even when I don't!: Gift certificate to his barber (to keep him lookin' good!)
  4. You would give anyone the shirt off your back if they needed it: Gift certificate to his cleaners (to clean said shirts)
  5. You are an amazing father: Gift card to a local grocery chain to be used for "pop" for this car cooler (he travels a lot for work and keeps a cooler of drinks in his car to keep from spending so much on drinks at gas stations.)
Once I had all of my envelopes stuffed, I used a gluestick to glue the flap of one envelope to the front of another creating a long chain of envelopes.


Then I folded it up, accordian style, and sealed the top flap with a label that I, again, created using my Silhouette (see pic at the beginning of this post).  Lastly, I tied it all up with a red satin ribbon and now I have a pretty (but still manly) Valentine to give my sweetheart tomorrow!


Neat, Sweet Treat Box

Shew! Between going on vacation, working on several projects at my paying job and getting sick, I haven't had much time for anything else.  I did want to post a few Valentine's projects that I managed to complete the last couple of days.

The first is one that I saw over at eighteen25 and the minute I saw it, I knew that someday I would make one of my own!  It's simply a small craft organizer (I found mine at Walmart for $2 in the bead section) that I filled with candy and used some scrapbook paper, ribbon, & heart foam stickers to embellish. I delivered them to a few of our neighbors whom we're really close with.  Cute, fun & super easy!!


Saturday, January 29, 2011

Homecoming Countdown

My husband and I are getting ready to leave for a four night stay in the Bahamas!!  It has been a really cold winter here and we're counting down the hours until we've got our "toes in the water, (butt) in the sand" as the Zac Brown Band would say (er..sing)!!  As a matter of fact I should be packing right now and not blogging, but that's neither here nor there! I just wanted to share this quick project with you all before we left.


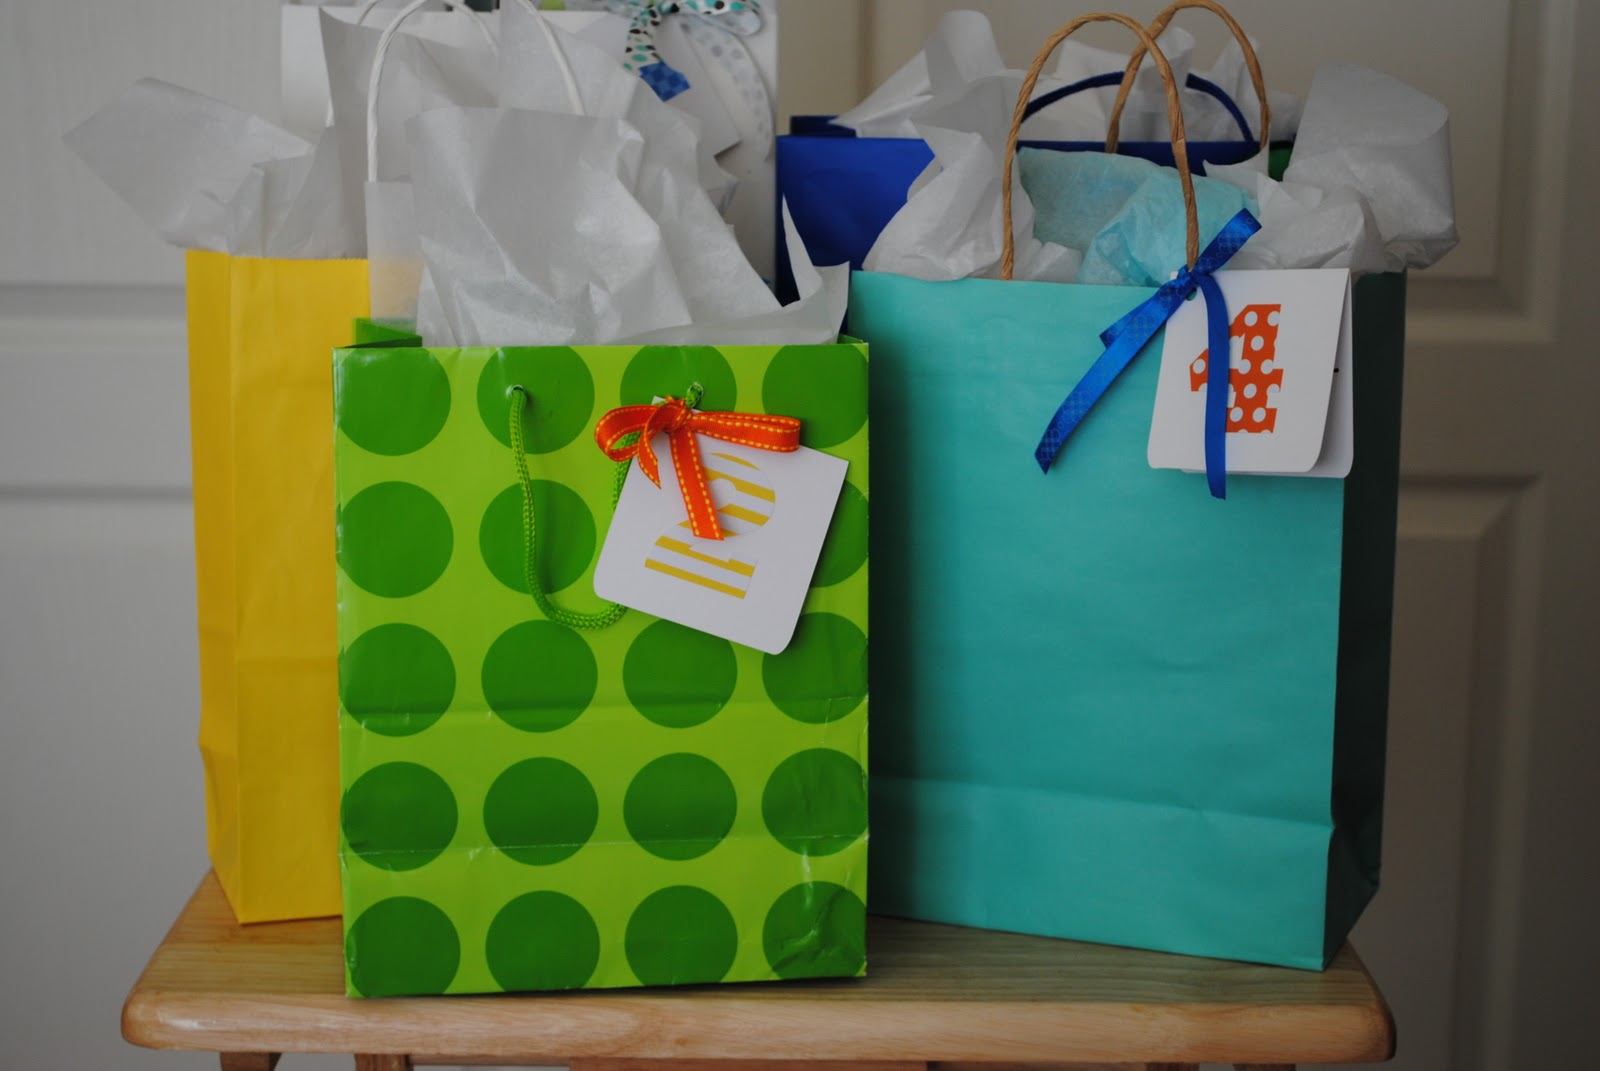
My in-laws will be watching our son while we're in the islands (Yes, this is a real vacation.......no runny nose to wipe, no diapers to change, no getting up with the sun......ahhhhhh!!  Don't get me wrong, I love my little guy, but it is nice to be able to escape for a few days just the two of us and have some grown up time.)  To countdown the days until mommy & daddy come home, I've assembled little goodie bags (one for each day) for him to open while we're gone.


Using my Silhouette I cut out five rounded rectangles (3"x6") from white cardstock and the numbers 0-4 out of different patterned/colored scrapbook paper.  I folded the rectangles in half, creating a card, and glued the numbers to the front.


Inside I wrote ".....more day(s) until we come back!"  With the exception of the zero card and inside it I wrote "We'll see you very soon!  Love, Mommy & Daddy"


I searched through the dollar bin at Target as well as the Dollar Tree to find five small gifts to put inside each bag.  Nothing crazy, just your run of the mill coloring book & crayons, bubbles, book, etc....


I put each surprise in a bag, added some tissue paper & tied each card to a bag with some scrap ribbon.  Now my little guy will have a little something fun to open each day that we're gone!